Hello again, in this post I will discuss some of the features of my todo application of choice — Todoist.
I’ve previously mentioned that most platforms have a built-in todo app — for example, Reminders on iOS and Mac and Google Keep on Android — but features offered by third party apps like Todoist can sometimes make it worth your while to consider alternatives.
I’ve recently moved from using Wunderlist, which was my favorite todo app before Microsoft bought and then killed it, to Todoist.
Both Wunderlist and Todoist have a feature that none of the built-in apps offer — they are cross platform. This is particularly important for me since all my home computers are Mac or Linux-based, and all my work computers are Windows 10 machines.
I needed an app that could work on all those platforms, in addition to working on my iOS devices (my iPhone and iPad).
In addition to working on all my platforms, Todoist offers the perfect balance, in my opinion, between simplicity and advanced features.
I will now provide a very brief overview of the basic features of Todoist — I’ll leave more advanced features like, for example, creating custom filters or automation using Drafts 5, Workflow or IFTTT for a later post.
Start page
When you open the app, it opens to a start page you can configure. The default start page is today’s tasks. The interface is very clean and minimalist, an aesthetic I appreciate in all my apps. Here is a screenshot of my start page.
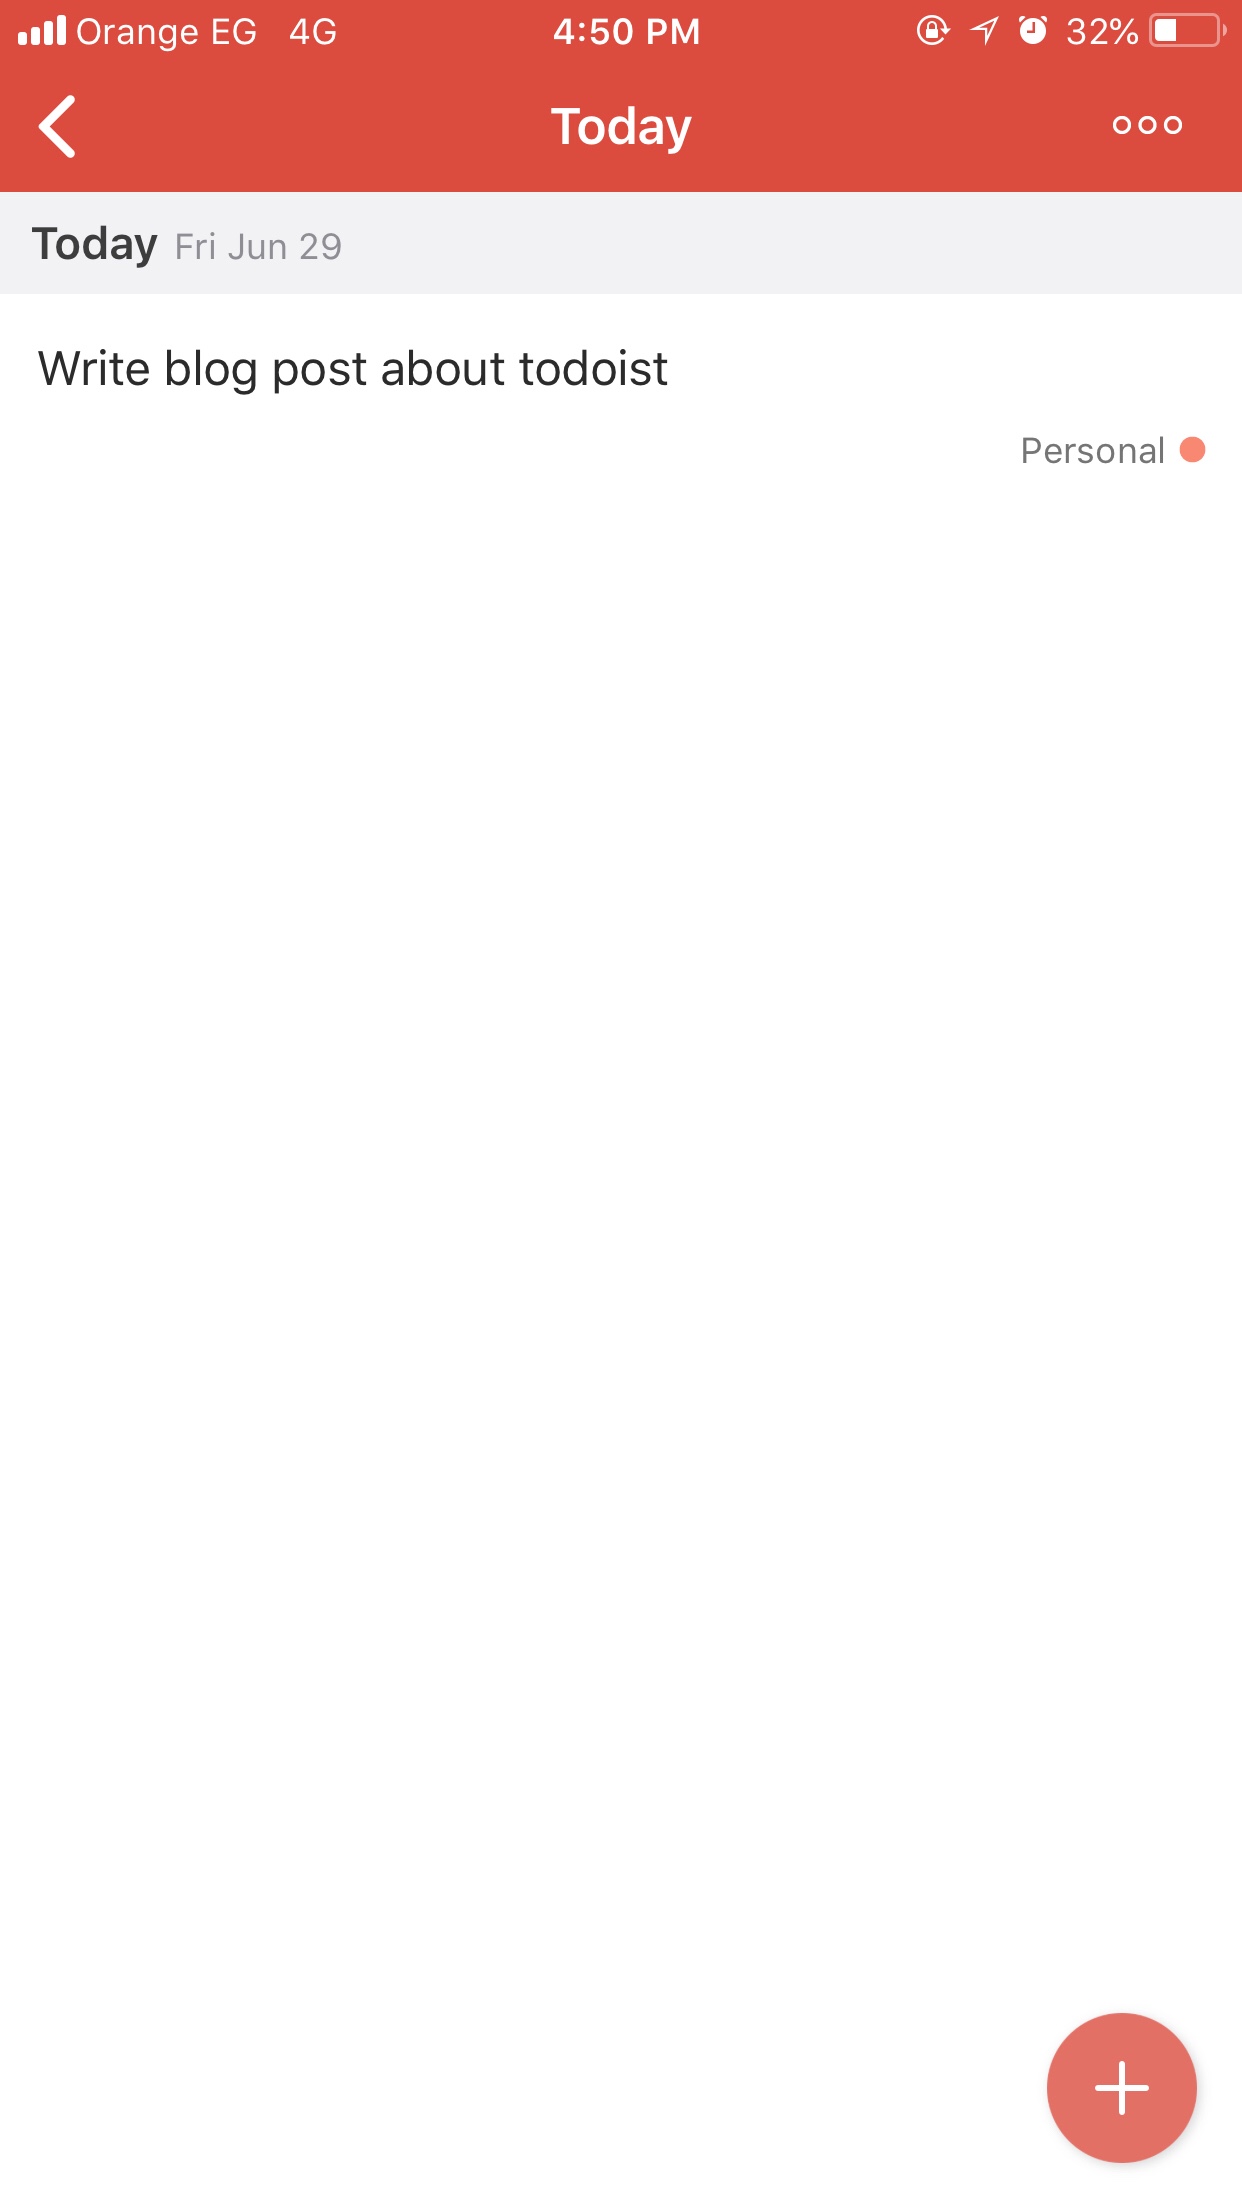
As you can see, it’s a very minimalist design that shows you the tasks you are yet to complete today. The red circle with the plus sign at the bottom right of the screenshot is what you press if you would like to add more tasks.
Customizing the start page
Although I stuck with the default “today” view for my start page, it is possible to customize this to anything. You do this by going to settings (the gear button at the top of the interface of the app) and then changing it. Below are two screenshots, the first showing the general settings page, and the second showing the options available to change the start page.
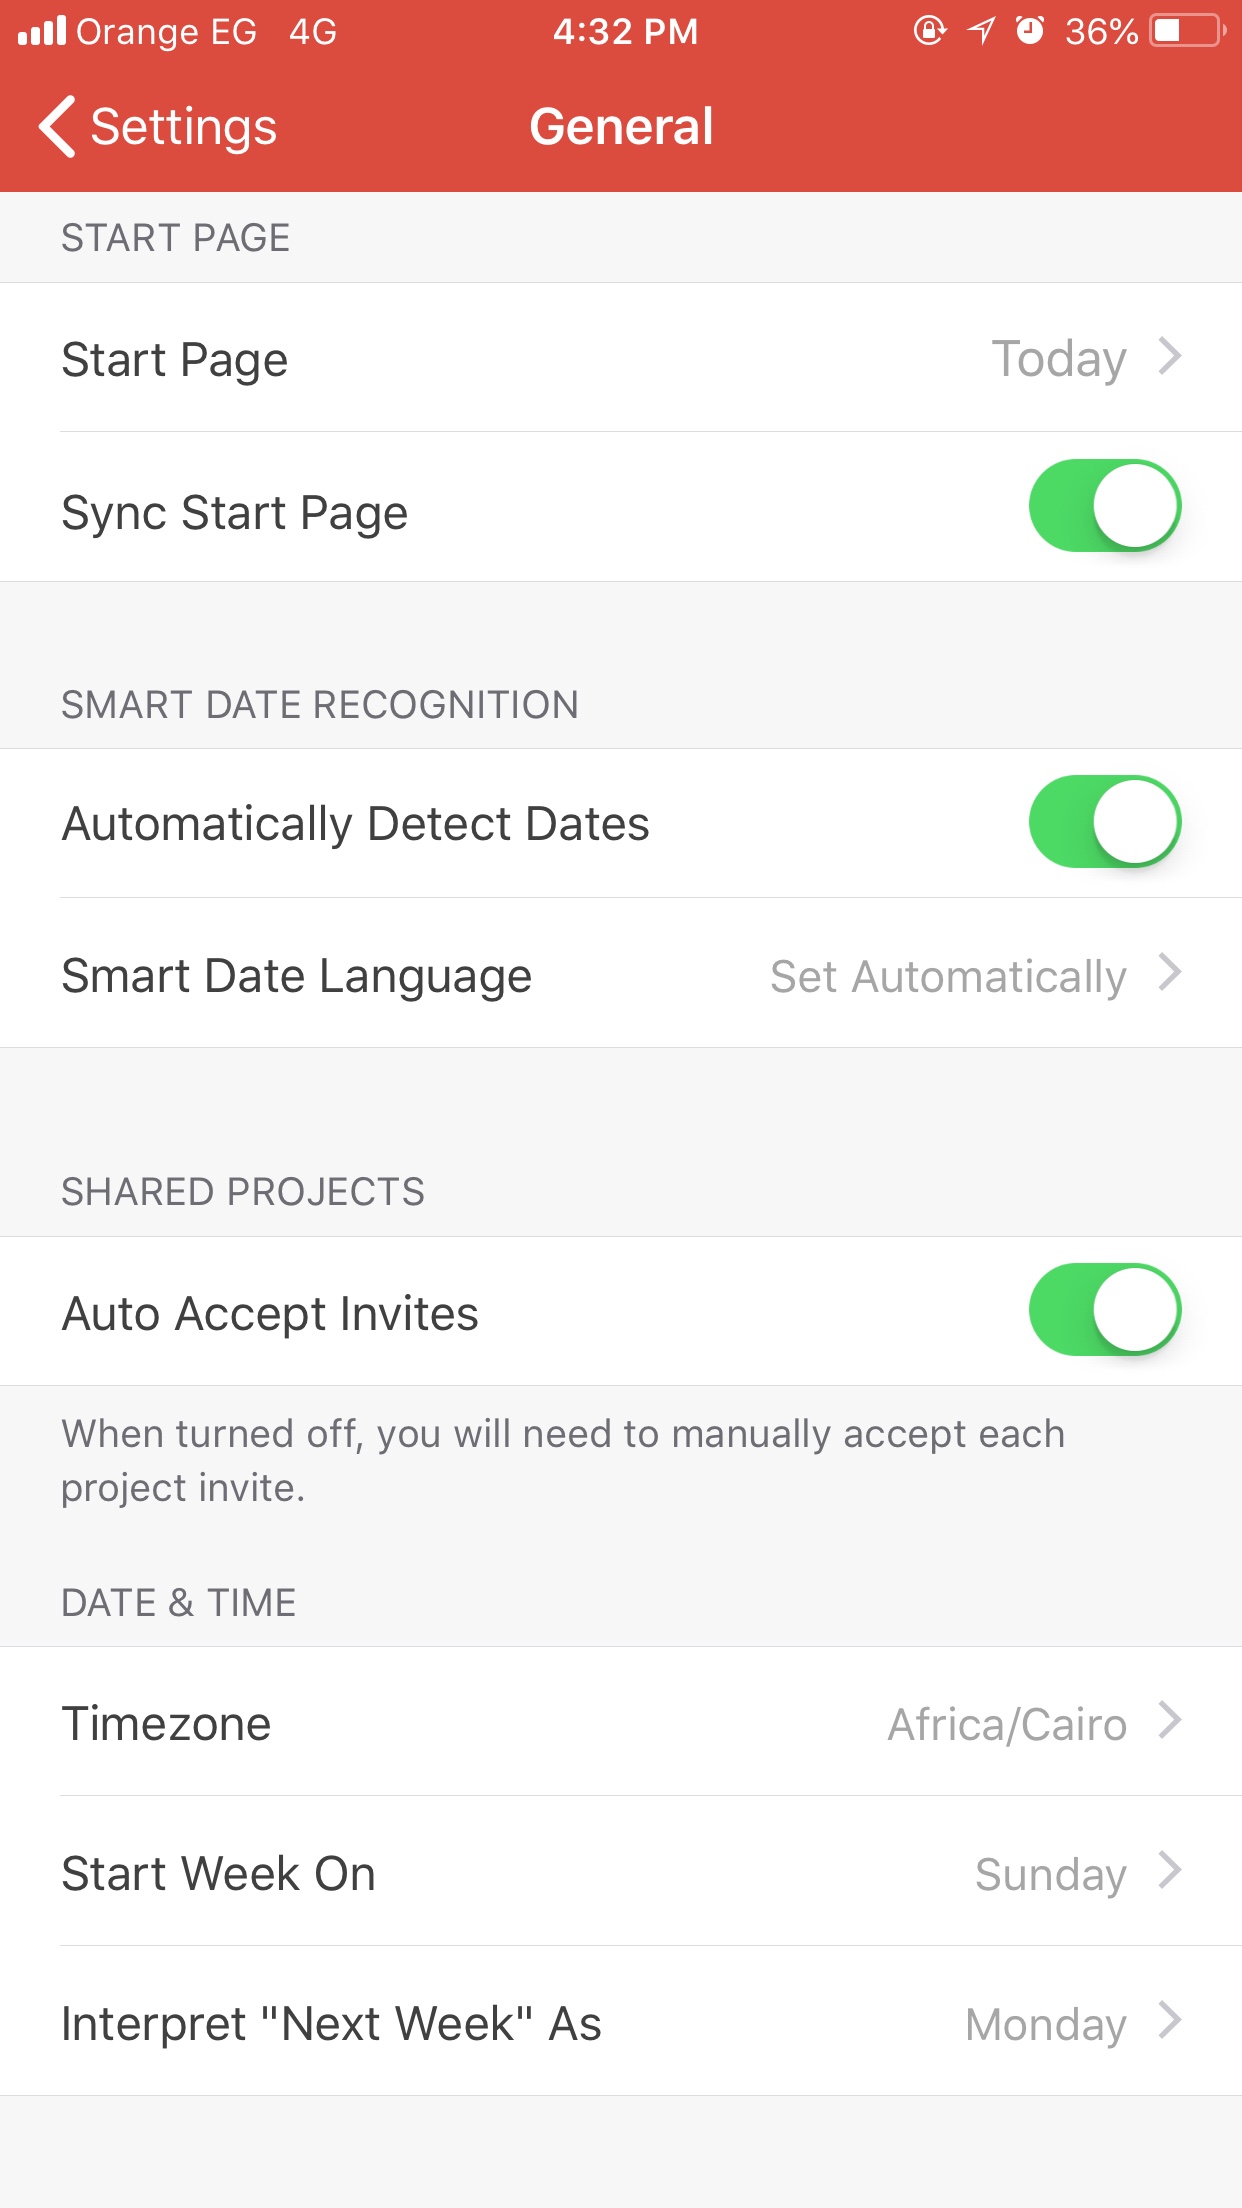
As can be seen in the image above, the first setting is where you configure your start page. The second setting, which contains a toggle button, allows you to sync your start page. If you choose to sync it, you will have the same start page on all devices. If you turn it off, you can have a different start page on each of your devices.
If you press on the first setting, the page below appears, allowing you to customize your start page.
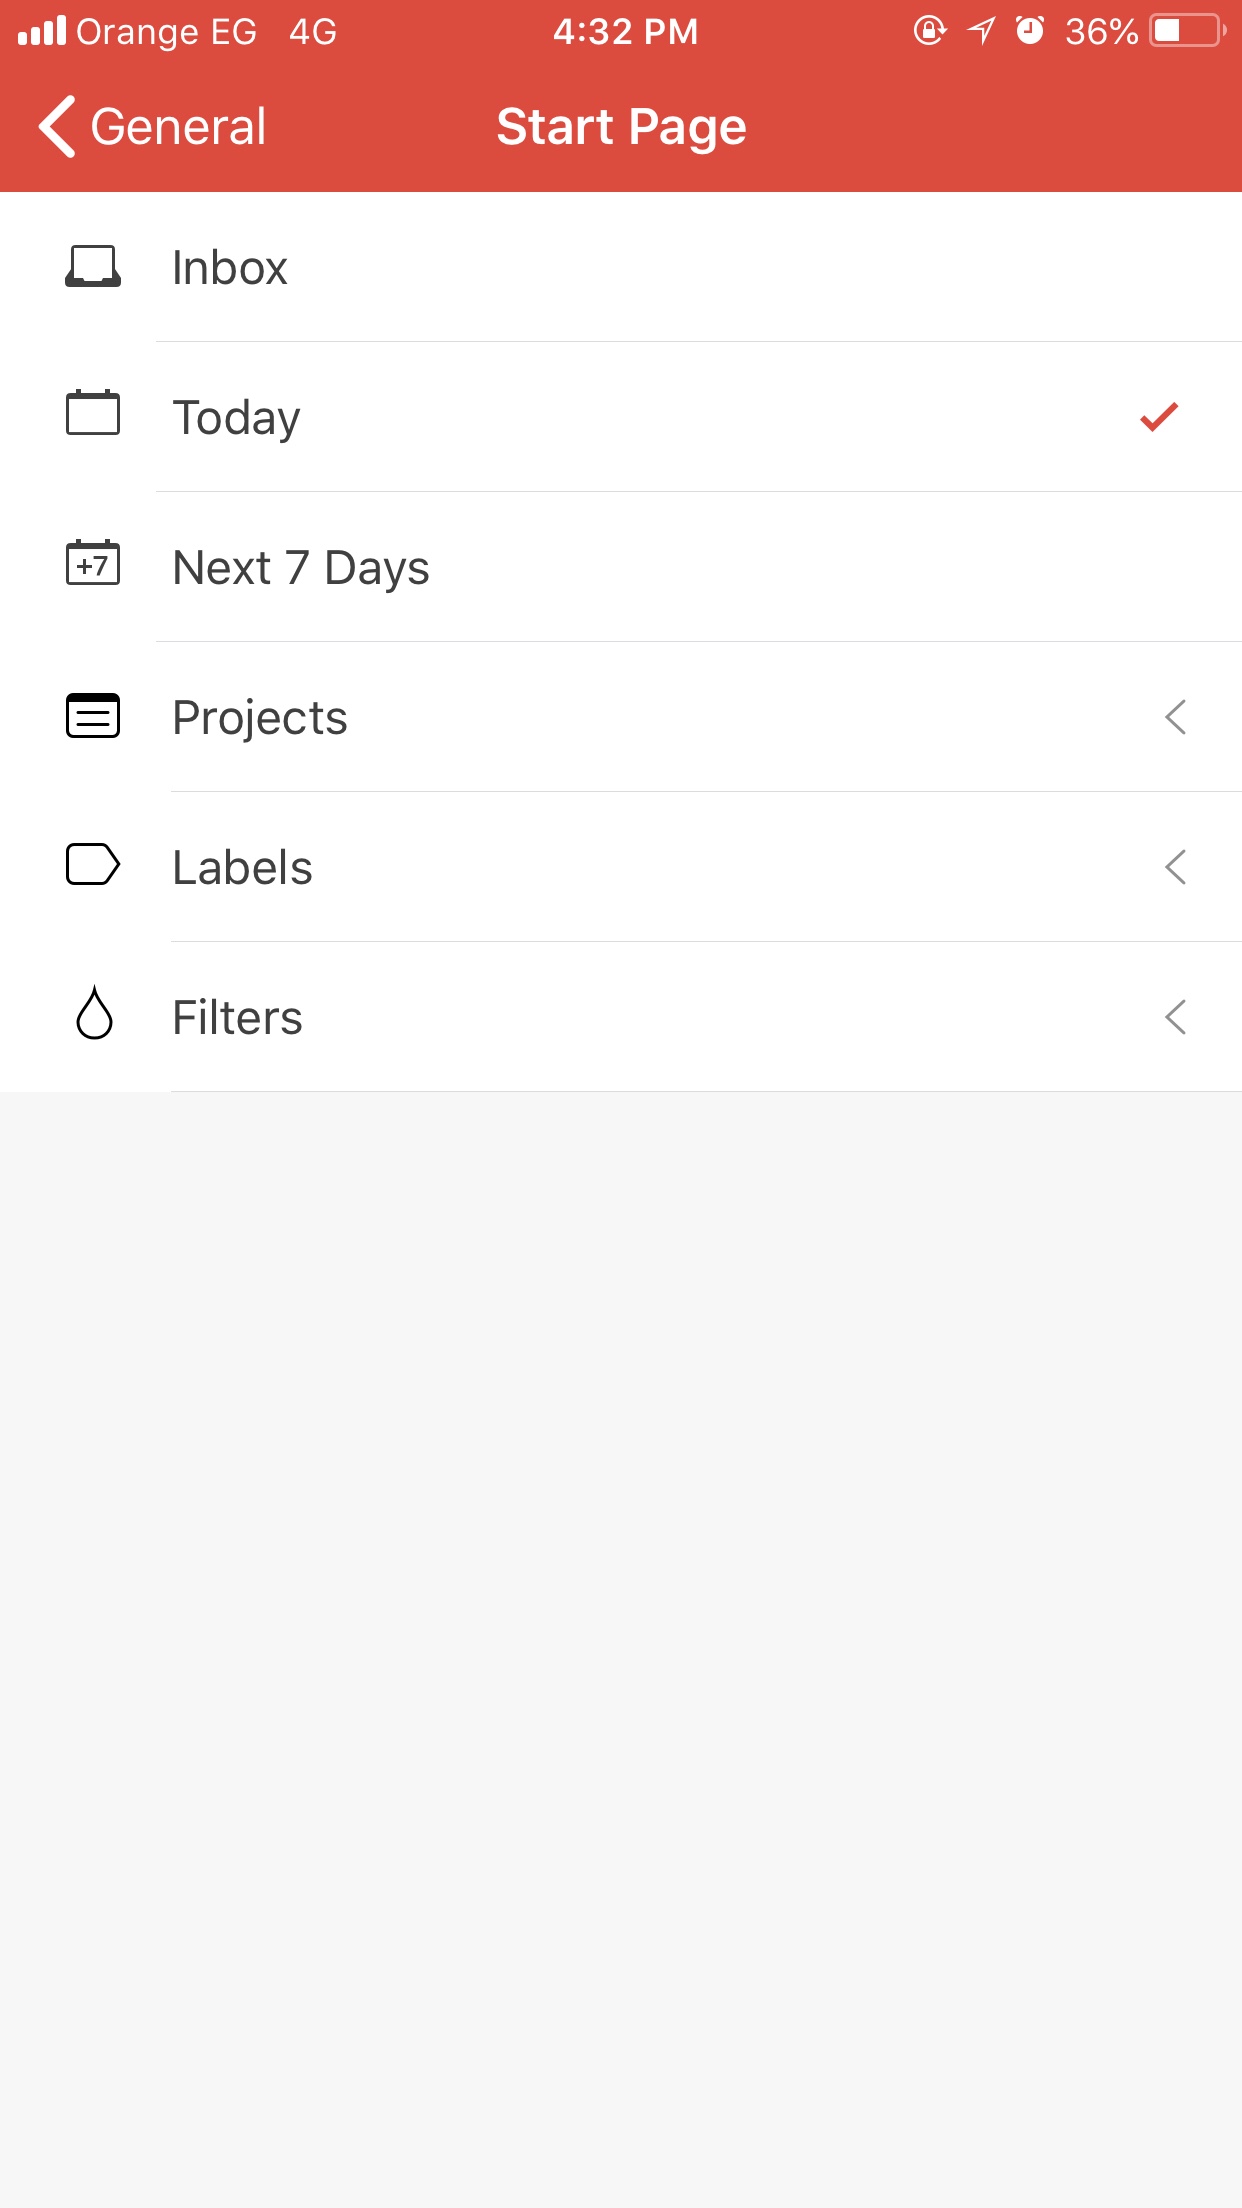
As you can see, you can choose any of your projects, filters or labels (more about each of these later) to be your start page. The most powerful of these is the filters section, since you can design a custom filter that uses several different criteria to design a truly unique start page.
General organization of app
If you go out of your start page, by pressing on the back arrow at the top of the page, you’ll be taken to the main organization screen of the app.
Here, all your projects, labels and filters are visible and you can choose whichever you would like to see. Remember from my GTD posts that projects are things that you need more than two steps to complete, and that we can use labels and filters to define contexts for tasks. Here are several screenshots depicting my setup.

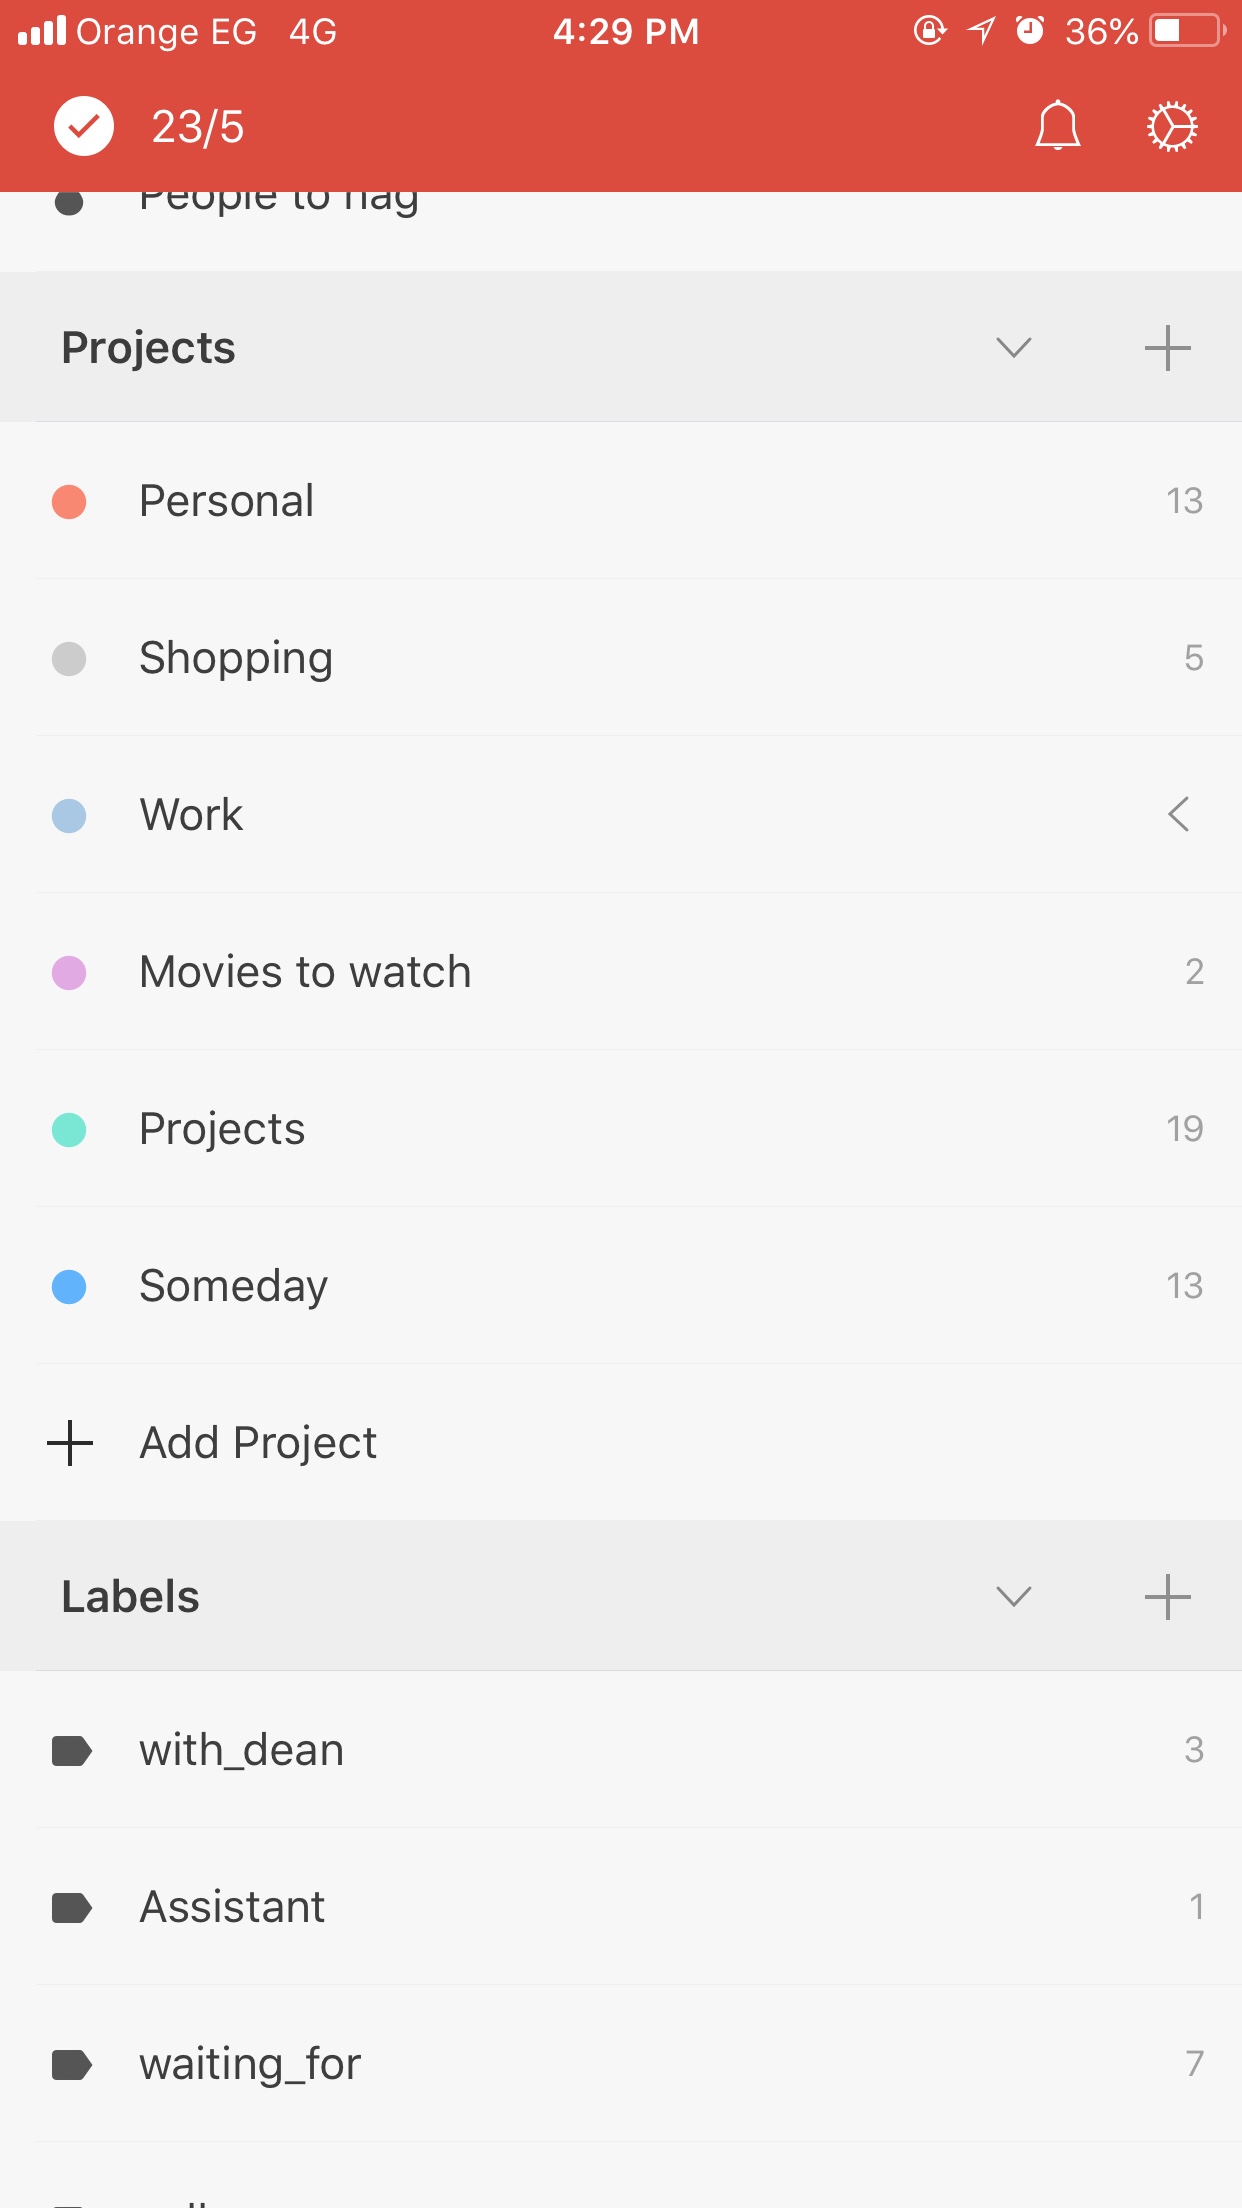
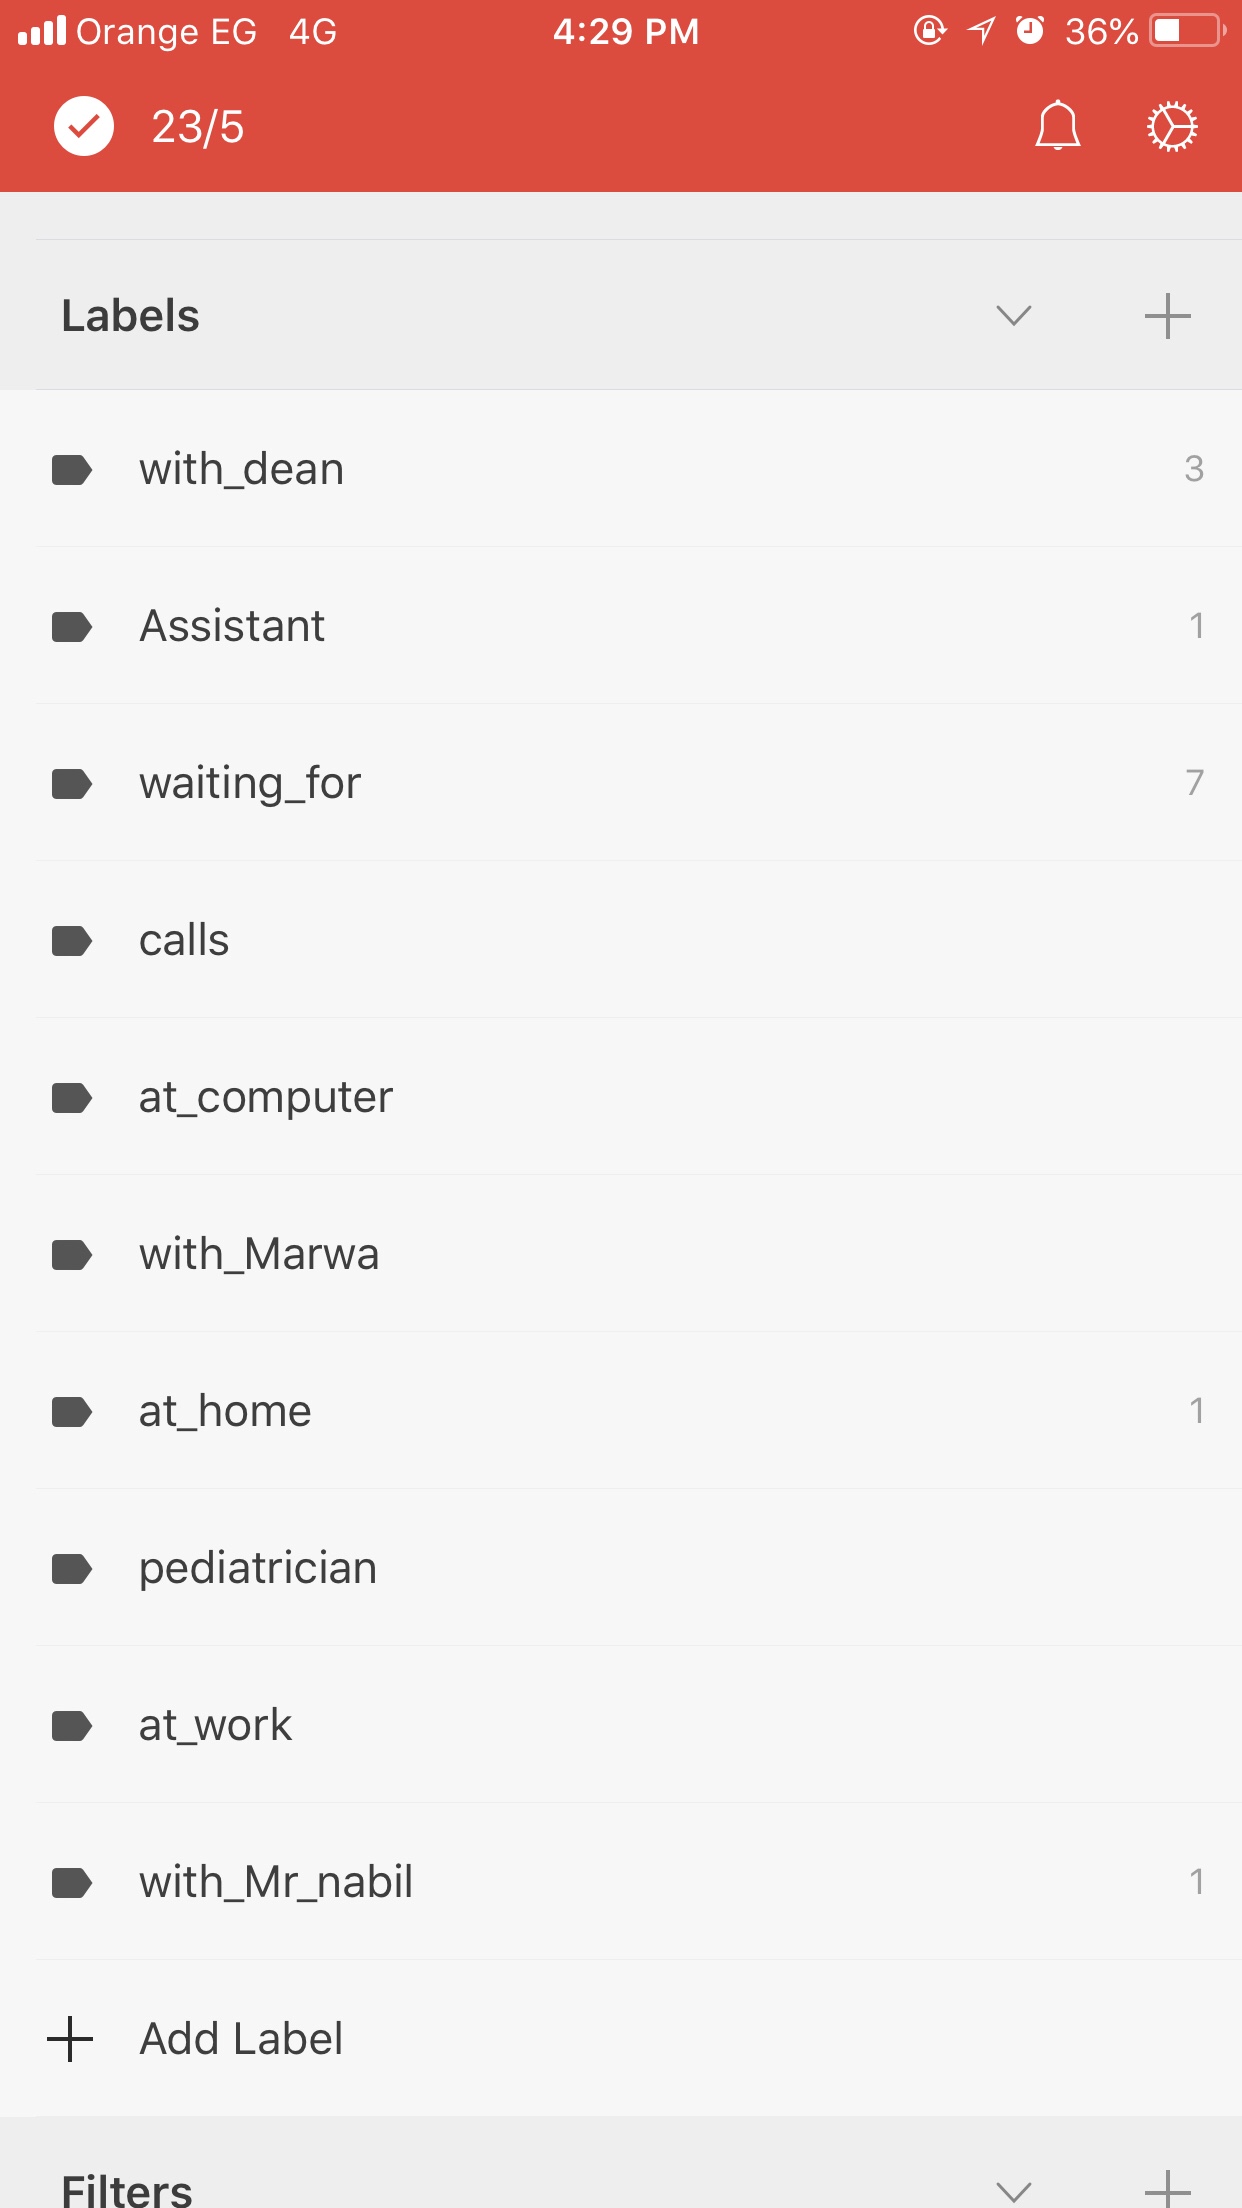

Projects are the projects you setup when you have a task that needs more than two steps to complete. Todoist allows nested projects, so, for example, I have one project folder for each area of my work responsibility under “work”. Expanding it on the app would reveal projects such as “registration”, “Human Resources”, “ABET”, “ISO”, etc.
The rest of my projects are the standard projects of GTD that I discuss in my previous posts about that topic.
I’ll now move on to discussing the labels and filters sections. If anything is not clear in the projects section, please let me know in the comments and I’ll try to further clarify.
As you can see, I use labels to provide context for my tasks. For example, if I’m at my computer and have some free time, I press on my at_computer label to bring up all tasks that I tagged with this label. I can then choose which of the tasks I would like to do now. Likewise, when I’m with the dean of the university, I press on my with_dean label to get a list of tasks I want to bring up with the dean.
I use filters to create custom searches that I want to use later on. For example, my “active and waiting” filter gets me all the tasks I need to do today as well as the tasks that I’ve delegated and not received a reply for yet.
This allows me to follow up with the people I’ve delegated the tasks to in order to check on status. You can design any filter you like with any custom search.
What does “next 7 days” mean?
The Next 7 Days section of the app, shown in the first screenshot in the previous section, is where you can quickly get an overview of your coming week. Below is an example of the view offered in this page.
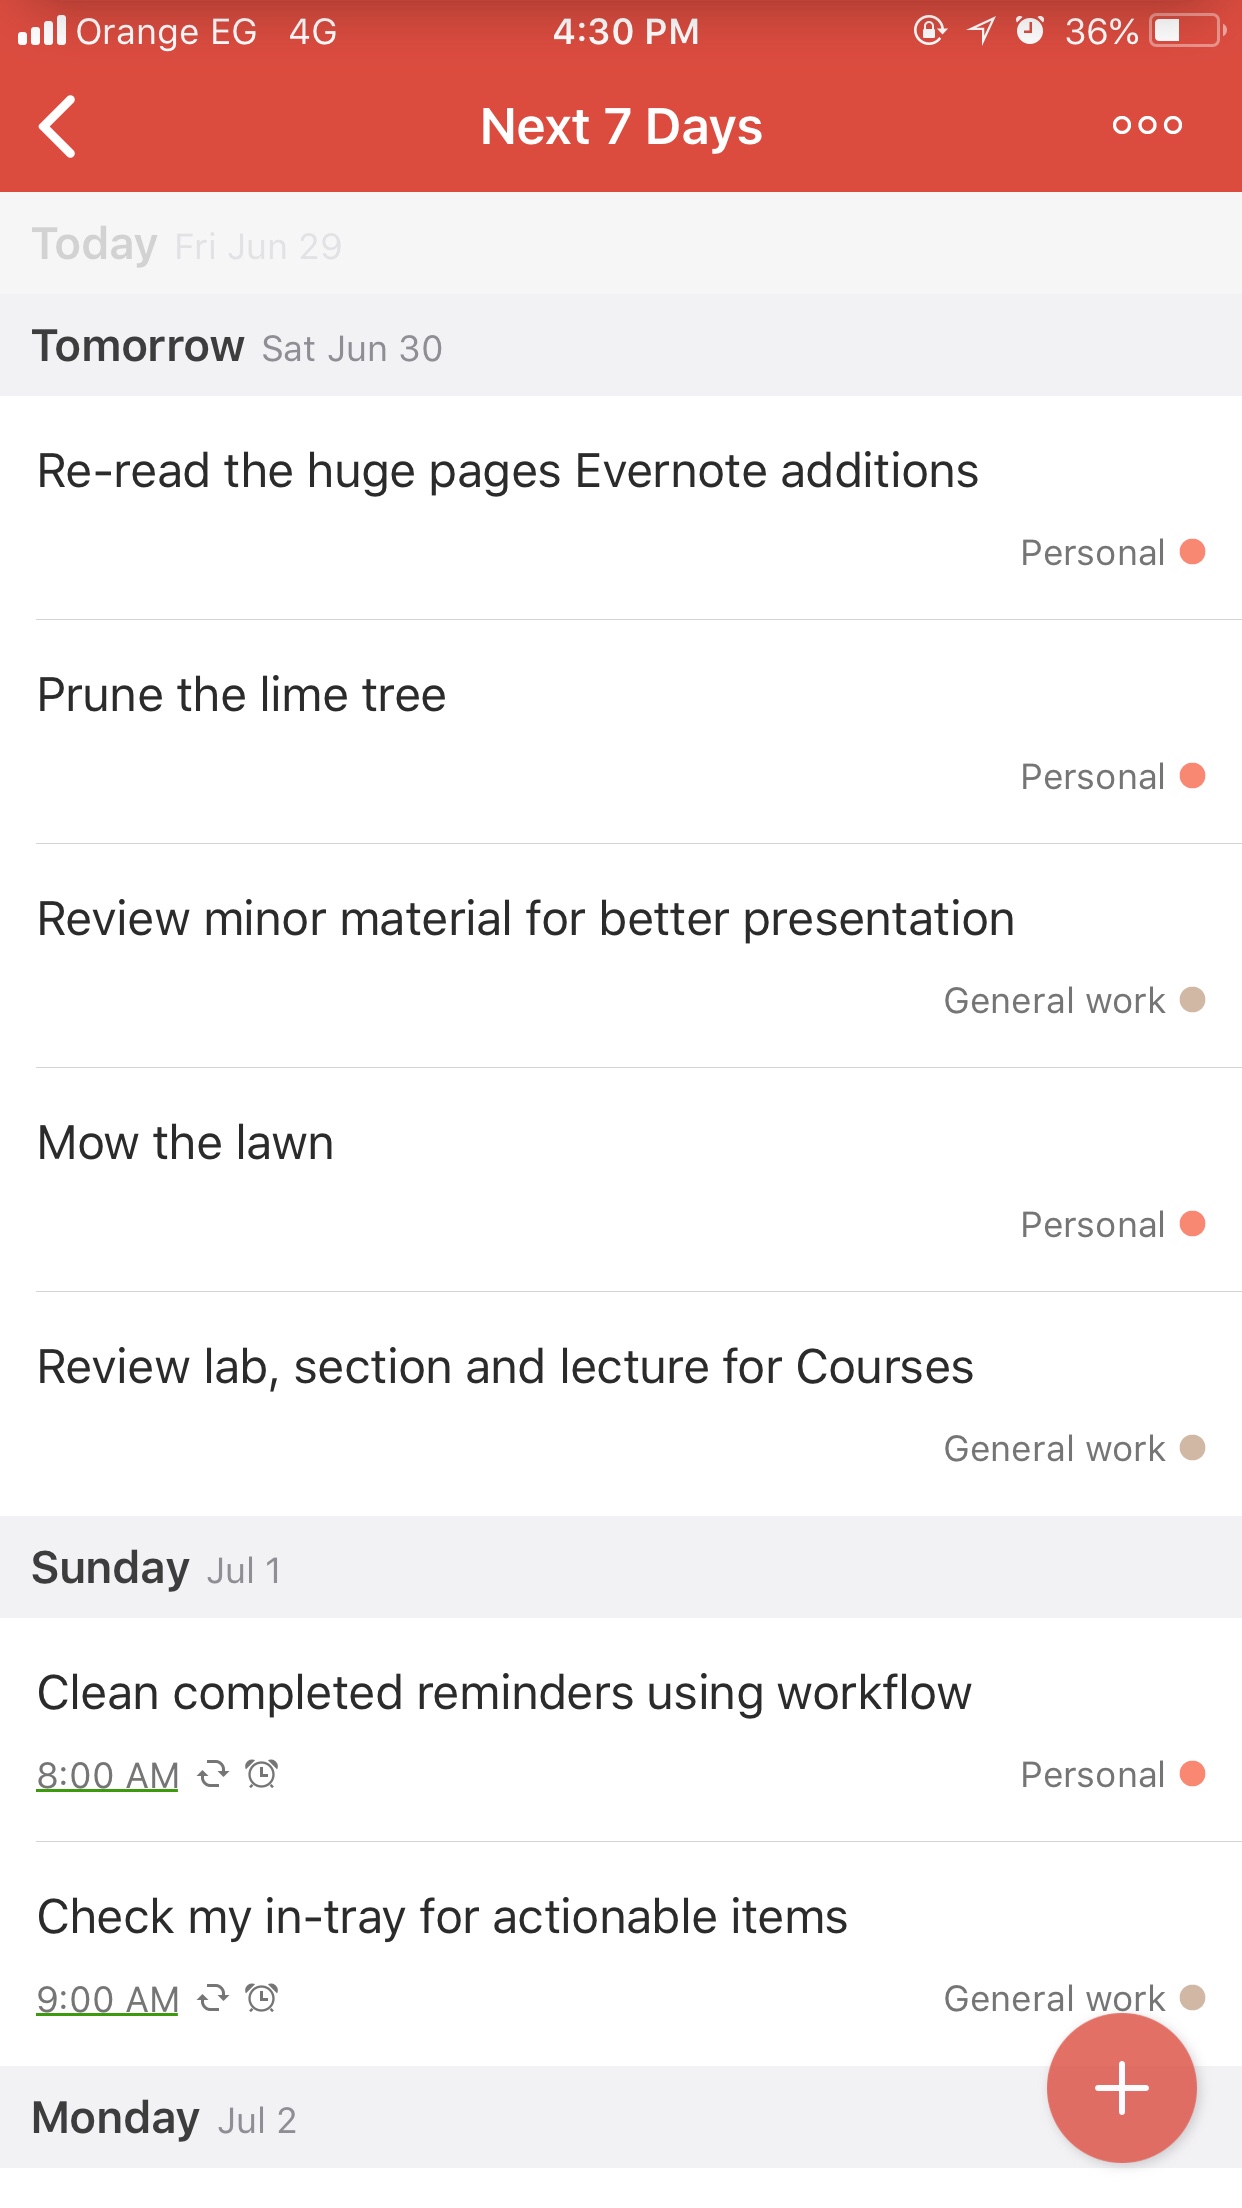
Each of the projects in Todoist consists of a similar view, but containing the tasks associated with that particular project rather than the scheduled view provided by the “Next 7 Days” and “Today” view.
Gestures
Todoist allows you to easily interact with tasks using gestures. Whenever you are in a view that displays tasks, you can swipe left or right to process the task. Swiping to the right marks the task as done, while swiping to the left allows you to schedule (or re-schedule) the task.
Natural language processing
When you add a task using the red plus button mentioned in the beginning of this post, the quick add dialog appears. This dialog allows you to quickly add tasks using natural language processing. Below are two screenshots depicting this.
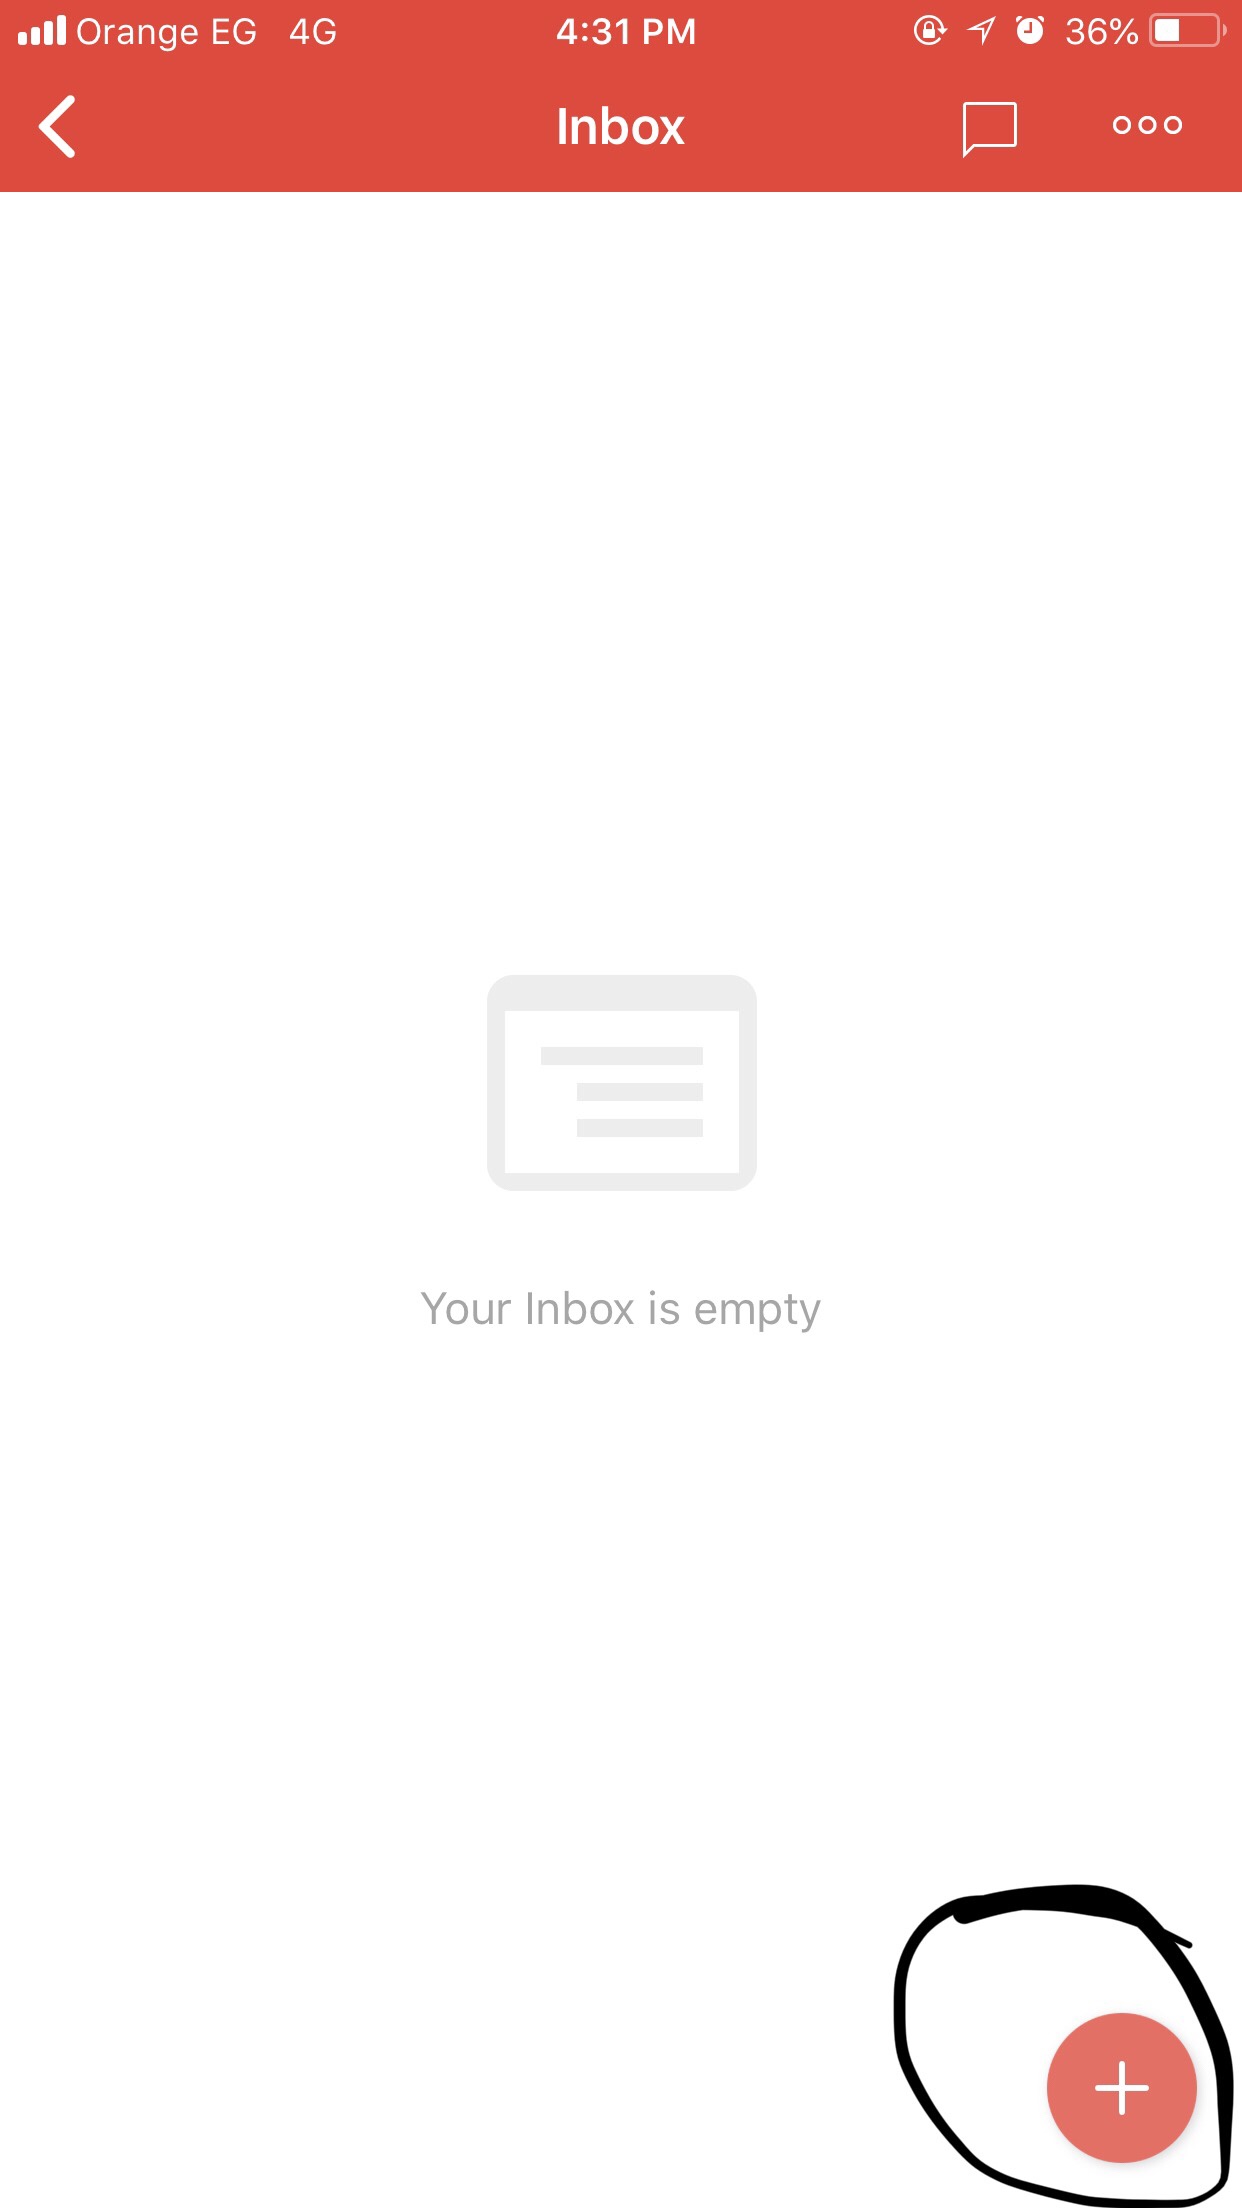
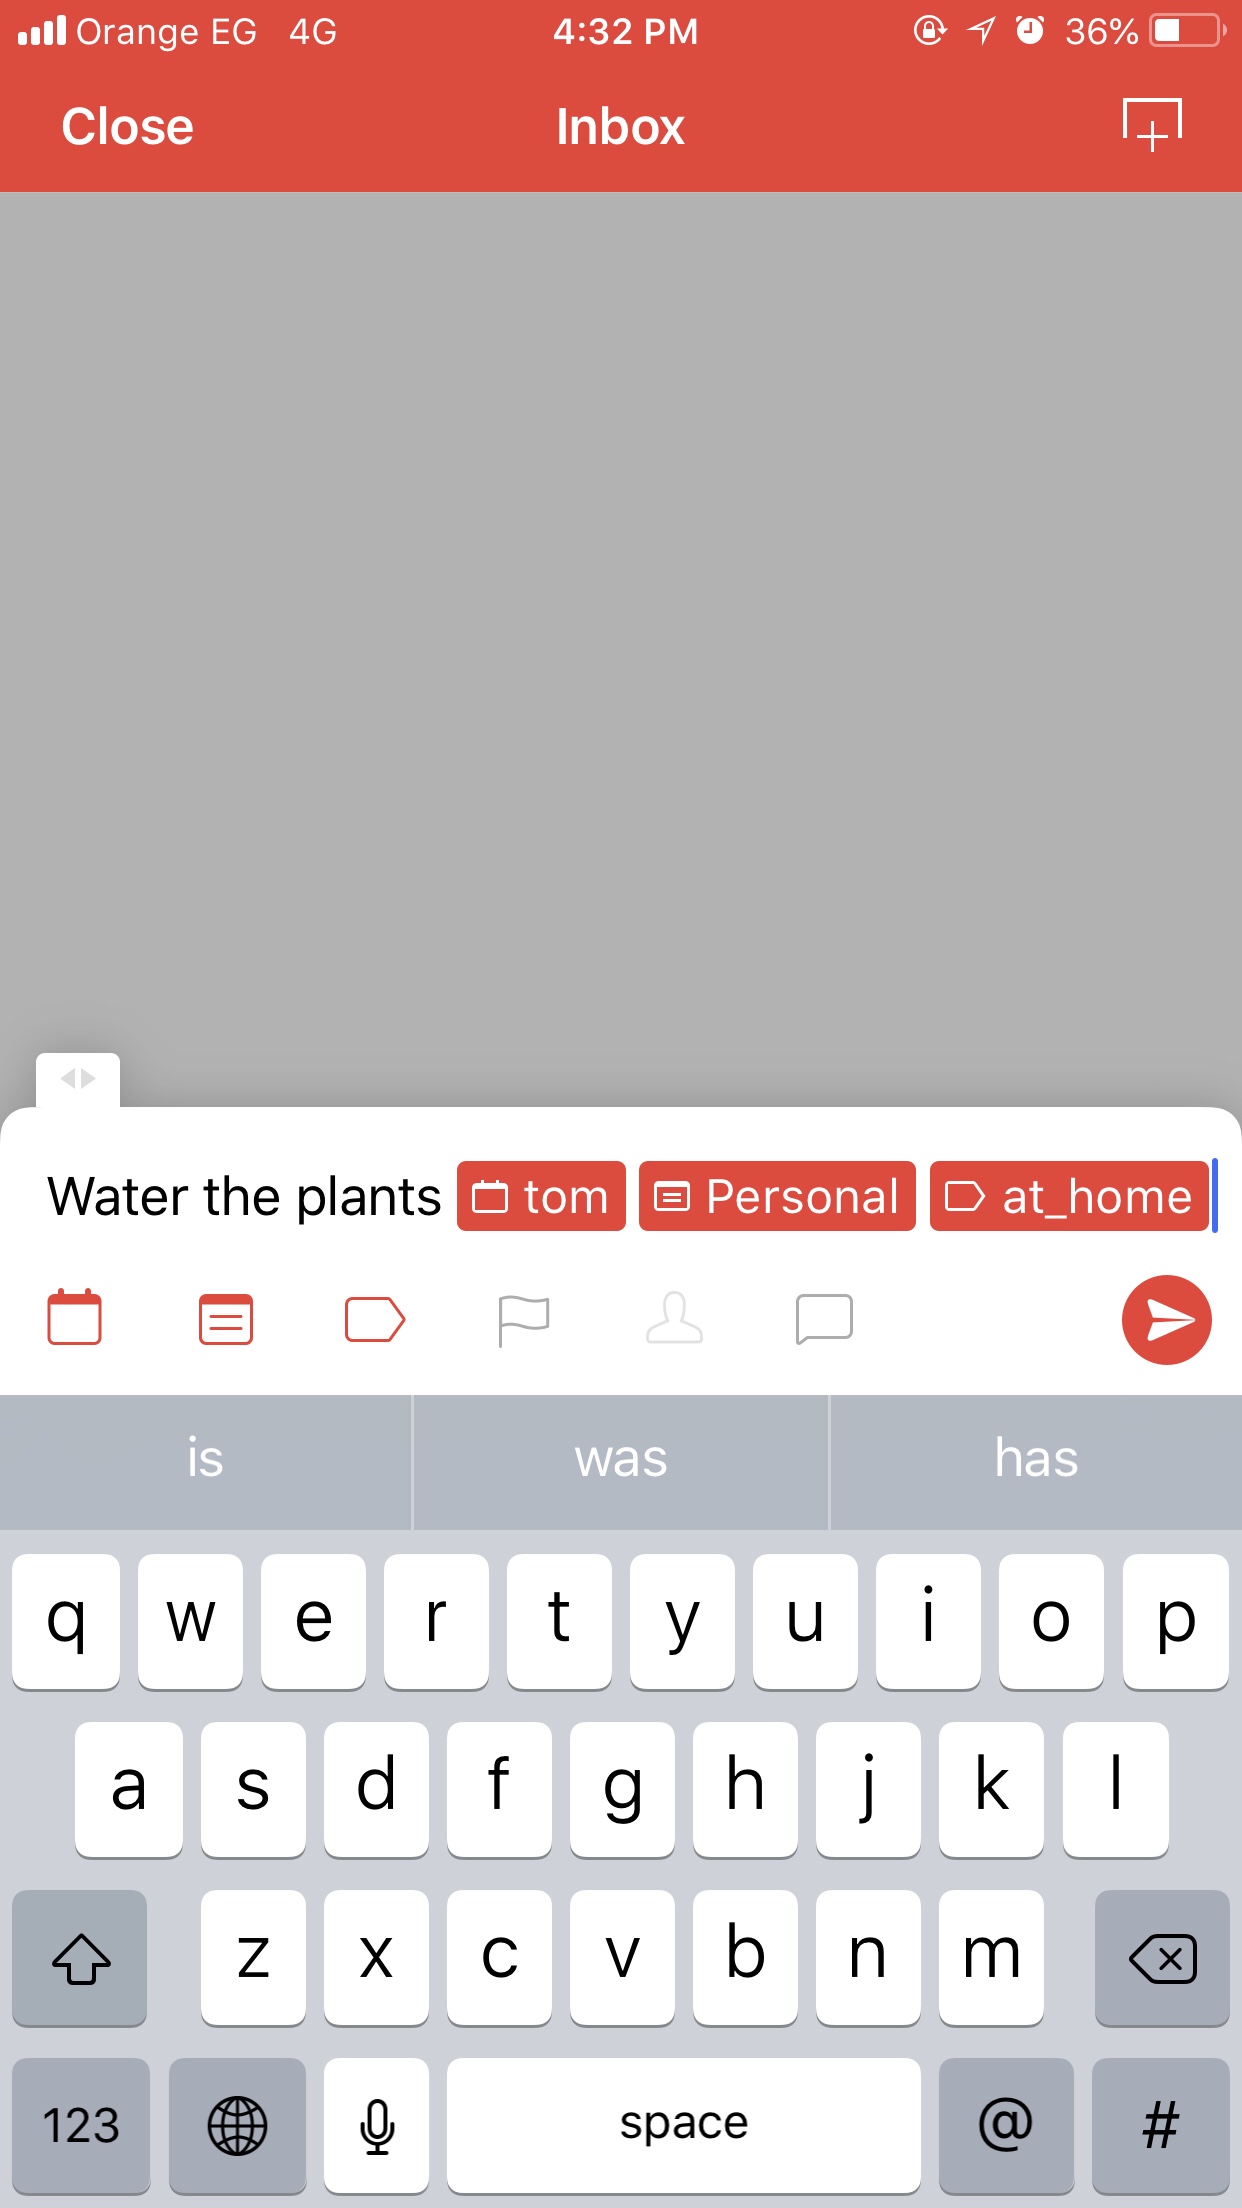
The parts highlighted in red have been recognized by the natural language processing engine of the app as the date, project, and label, respectively, of the task added.
Todoist recognizes dates automatically, you can even set up recurring tasks. So, for example, “Take file to office next Monday” will add a task “Take file to office” and schedule it for the coming Monday.
Recurring tasks can similarly be set up, for example “Take out the trash every Sunday at 7PM” will schedule “Take out the trash” in the evening of every Sunday.
Unlike dates, which Todoist interprets automatically, you need to give Todoist a bit of a hand when you want to choose a project or label to use with a task.
Projects should be preceded with # and labels should be preceded with @. So, for example, the task shown in the screenshot above was created using the following string “Water the plants tom #Personal @at_home”.
Note that I don’t have to spell out “tomorrow” completely, just typing the first few letters of the word will allow Todoist to recognize it. Once it’s recognized, Todoist will highlight it in red and you can move on to writing the rest of the task creation string.
That’s it ladies and gents, these features, especially the natural language processing and the ability to access the app from all my platforms, make Todoist an ideal choice for me. If you haven’t already chosen a todo app that you love, give Todoist a try and see if you like it. Until my next post, bye for now.



1 Comment